
 |
The Internet's Largest and Fastest Growing Engraving Community
Discuss hand engraving using basic to the most advanced methods and equipment
Forum Members: 14,762. Welcome to our newest member, Katherine
EngravingForum.com -
Domain since Feb 7, 2003
 Graver Video Conferencing is empty Join now!
|
|||||||
| ENGRAVING TOOLS - Paypal accepted | Classes | Glossary | Feedback | Tips | Sharpening | Bulino | Videos | Forum Policies |
 |
|
|
Thread Tools |
|
#1
|
||||
|
||||
|
(If you would like to comment on this submission, you may do so by posting a reply in this thread. Thanks! Kaitlin)
I was going to wait and do this one "after the fact" because I figured there was a pretty good chance this project would go kablooie, but to my delight, so far so good. Therefore I'll take the optimistic route and do this in real-time, once I get you caught up on all I've done so far. Some history: I hadn't had much luck with color scrim thus far, though the dragon I did about a year ago did turn out really nice, I'll admit it wasn't exactly as I had anticipated. Everyone seems to have a different technique. Some people are sealing ink between layers of wax. Some are just being super careful about inking to avoid colors overlapping and bleeding into each other. I tried the super-careful route (on the dragon) and though it worked it was a serious pain in the you know what, and I could tell there's no way I could pull it off on a big piece, since I was always having to wipe the ink away from the previously inked areas, and at some point that just becomes impossible. Someone's probably going to ask so I'll just post this, here's the dragon, my first color scrim, I think I did this last October: 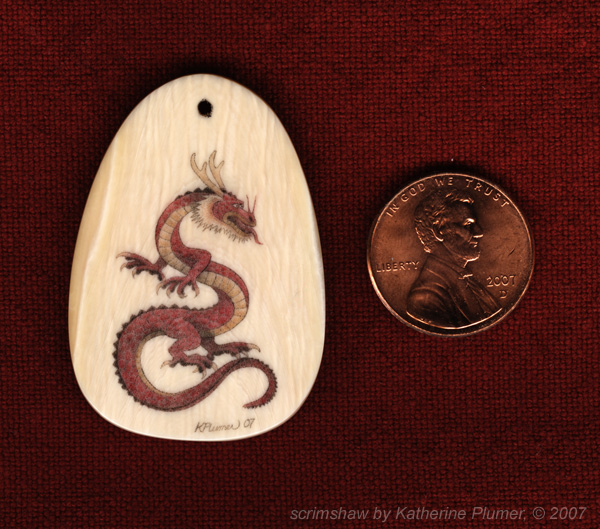 I tried the wax thing and that one (you will never see this piece!) was a disaster. I was using etching ink, and it seemed no matter how long I let it sit and dry I'd lose some of the ink when I applied the wax (Renaissance wax, fyi). And seriously who has time to wait for things to dry out for weeks or months when you have a lot of colors you need to apply. So I kinda set the the color stuff aside and have focused on black and white work only. And that's fine, because often I think that's makes a stronger statement on such a tiny piece anyway. But darn it, I really wanted to figure out this color thing. Those in the know all told me I'd have to work dark to light, starting with black and ending up with my lightest colors. Ugh. My brain works light to dark. I've been an artist/illustrator primarily working in colored pencil (though lately I'm more of a graphite girl, I think scrim's b/w influence is rubbing off in other realms) for years, and I work light to dark, and I'd like to be able to do scrim the same way. And the first thing that was clear to me is I'd have to use a different ink, sadly, as I am rather fond of printmaking ink of all types. But it didn't agree with the Ren Wax, and besides that I ran into a problem where someone wore a pendant *all the time* and the ink started to pull out. Maybe that would happen with any ink, but it makes sense. You can use oil to clean etching ink off of tools, plates, etc. So of course skin oils will over time do the same thing. *sigh* That means back to using colored India ink, not my favorite, but I'm determined... Goals for this project: learn to scrim with a different ink, determine if it's possible to work from light to dark, hopefully make a little something pretty. |
|
#2
|
||||
|
||||
|
So this being fairly experimental (though I did scratch some lines on a little scrap and the results there seemed promising) I decided to stick with something small and fairly simple. A pendant. A colorful image... how bout a peacock (you're surprised I didn't pick a chicken, I know...)
Thankfully I don't have to talk about sanding, the pendant pieces are polished when I buy them, but whatever you do, make it smooth! Really smooth! Okay, so I got a reference photo, did a b/w sketch (just to get the outline of the image, here it's the ink line drawing), scanned the sketch, shrunk it down to the size of the pendant, and printed that out at super quality. I'm just using regular paper for the printout. 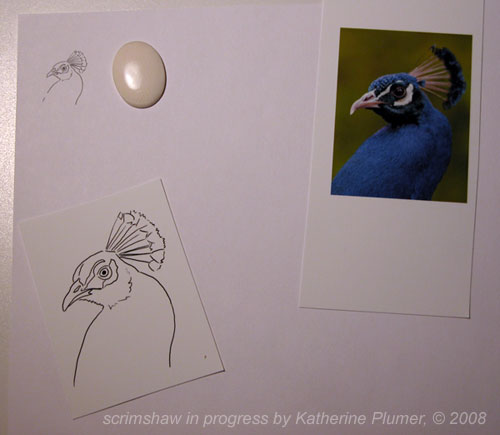 Now, if this was a flat surface I'd just tape it on there and dot the outline (see bear cub tutorial for that) but this being a domed cabochon, it's a little more work. This is how I did the transfer on the elk tooth too. Under the scope, with a really sharp pencil (I think I used a #2), I draw over the little tiny printout. 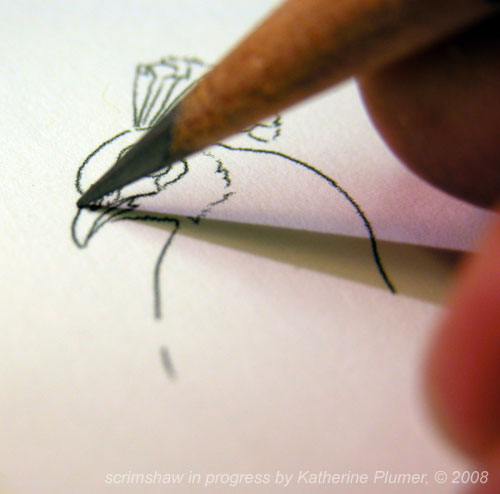 And then I stick a piece of scotch tape on there and immediately pull the tape up. Be careful, you don't want to rip the paper. See, the graphite has transferred onto the tape! Nifty eh. I know you can also do this by printing straight from your computer onto clear address labels, but that would have required me to go buy those, and tightwad that I am, this works just as well. 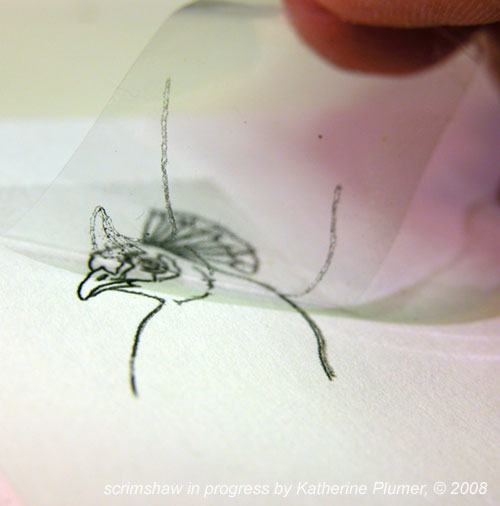 So, stick the tape to the ivory (or whatever), and then go ahead and dot the outline, poking through the tape and into the ivory just enough to make a dotted outline. This takes some practice to get a feel for what sort of pressure you should be using. 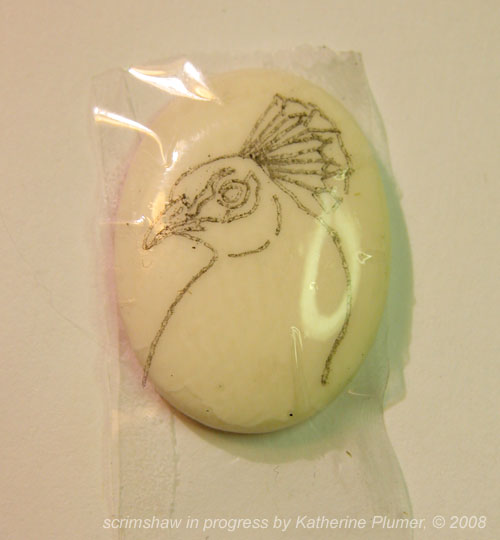 Dotting the outline: 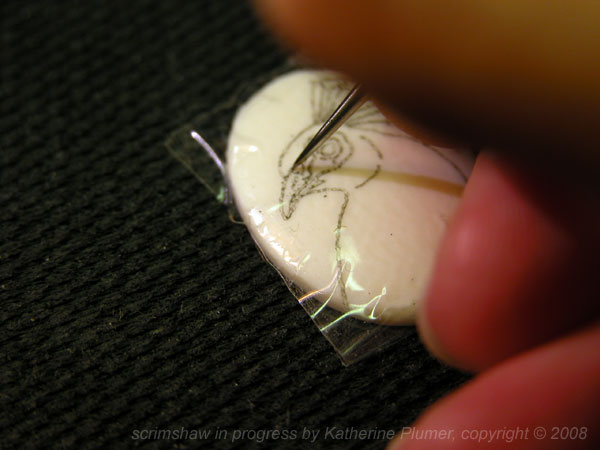 I want to clarify that normally I am holding the piece steady with my left hand. However, having only two hands, the left one gets photography duty while I'm doing these tutorials. Just keep in mind you have to hang onto these things. I don't use a vise (I don't have one). Last edited by KatherinePlumer; 10-06-2008 at 12:44 AM. Reason: forgot a pic! |
|
#3
|
||||
|
||||
|
Okay, somewhere around this point I decided I'd better figure out how I'm going to do this. Translating a photo into colored pencil is one thing. Translating a photo into a stippled-scrimmed ink image that would fit on a thumbnail, well that's a whole different beast.
For one thing it needs to be somewhat simplified, I mean let's face it, that's really small. So although if I was going to draw this is as really top notch colored pencil piece I would probably end up using at least 15 colors, that's a little overkill for inking a scrim. But mentally trying to translate the photo into color scrim was tough. How many colors? How to do the gradations? In what order to overlap colors? I decided to forget the photo and make a new reference image, a drawing. In the interest of simplicity I reduced it to 5 colors (black, pale warm gray, blue, blue-green, dark brown), and I drew it exactly how I intend to scrim it. I'm certainly not saying you'd have to do that, it's just what works for me. Really that's all any of this is, what works for me (still learning!) ![Smile[2]](/images/smilies/top smiles/smile[2].gif) So here's the plan! Yes, I'm going to try to scrim from light to dark! This is my colored pencil "reference image." 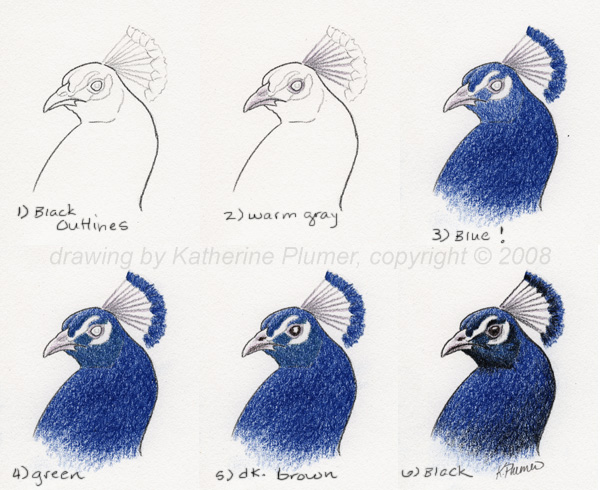
|
|
#4
|
||||
|
||||
|
Here's how it looked after inking the lightly dotted outline. Subtle, but it's there. Some of the dots in the crest feathers were too shallow to hold ink at this point but I could still see them under the scope.
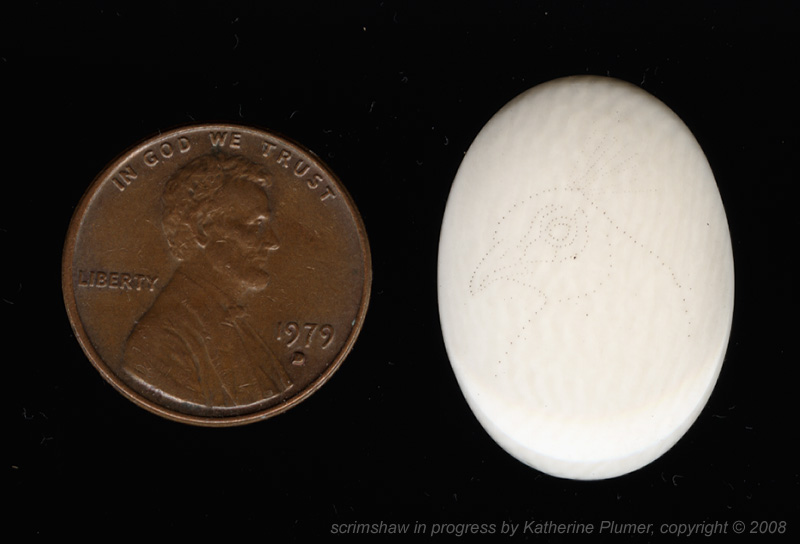 Then it's time to connect the dots to make a stronger outline. I stippled the entire outline of the image, and brushed on the India ink with a really small brush (it's a 2/0 round sable, if anyone wants to know, wouldn't mind an even smaller one though).  This ink will dry all over the surface. At this stage of the game I was removing the excess ink with a barely-damp q-tip. This changes as I get farther into the project, but it's what I was doing at the time. It works, but pushing around wet ink makes it more likely to get into places you don't want it (your other colors). I'm really trying to avoid that. 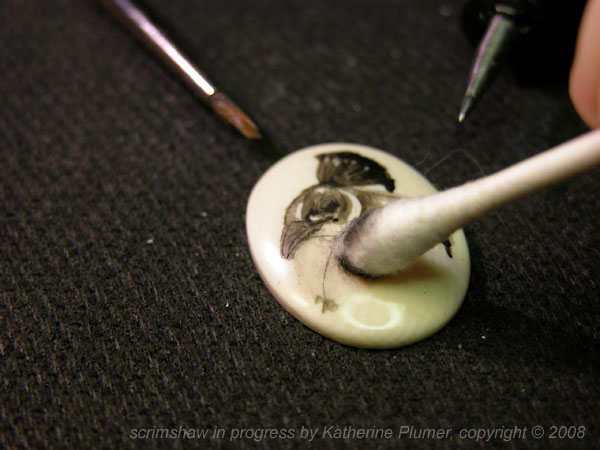 And here it is fully outlined: 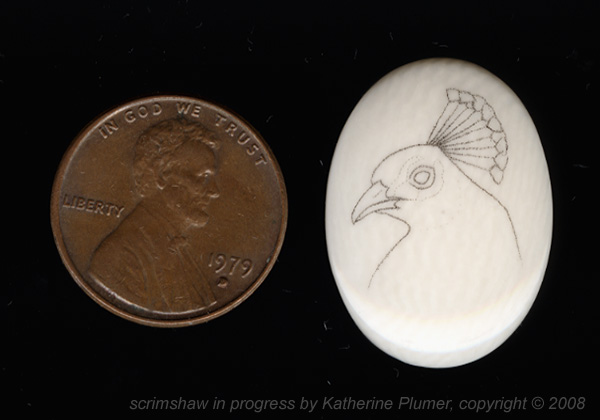
|
|
#5
|
||||
|
||||
|
And then I did all the gray parts (beak, around eyes, shaft of crest feathers). I used the same process I just showed. I did end up with some gray ink in places where it shouldn't be (the black outline) but I don't think this is going to be a problem, and I think there's a better way to do this... (I'll show you as soon as I get there).
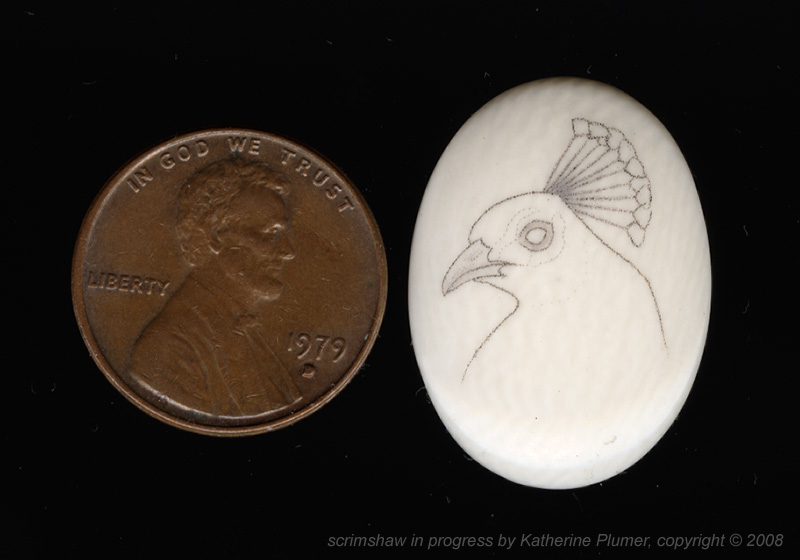 And that's as far as I am on it now. I am currently working on the blue areas, so stay tuned! :D |
|
#6
|
||||
|
||||
|
I've been working on the blue layer. That's finally done. As I said earlier I had been removing the excess ink with a barely-damp cotton swab. Well, I'm a little concerned about pushing wet ink around, I think that's more likely to result in colors intermixing where they shouldn't.
When I finish with one particular color, I apply several coats of Renaissance Wax. Again, I'm all sorts of low tech. Smear it on, let it dry, buff it down, repeat a few times. This will hopefully keep newly applied ink from sticking to previous color layers, though you still need to be REALLY careful with inking, and don't deliberately put one color over another unless you are hoping they'll mix. Anyway, I make a zillion stippled dots, apply the ink with a tiny brush (the thing I DO like about using this drawing ink is I can be more precise with the inking, you can't brush on etching ink), and now instead of wiping it away with something damp I'm pretty much just buffing it down when it's dry. It takes some doing, but it's doable, and seems to result in less color pollution, for lack of a better term. I'm using a scrap of fabric from nylon stockings, which is soft enough not to scratch but has enough texture that it will (eventually) rub the ink off. Feel free to try other things!  And here's how it looks now. In hindsight this blue color isn't quite right. It's not bright enough. I should have mixed in just a smidge of white, but I'm really not going to worry about that, because the good new is that so far this is working and that's super duper. ![Smile[2]](/images/smilies/top smiles/smile[2].gif) I shouldn't be too celebratory yet though because the darker colors are really going to test this out! I shouldn't be too celebratory yet though because the darker colors are really going to test this out!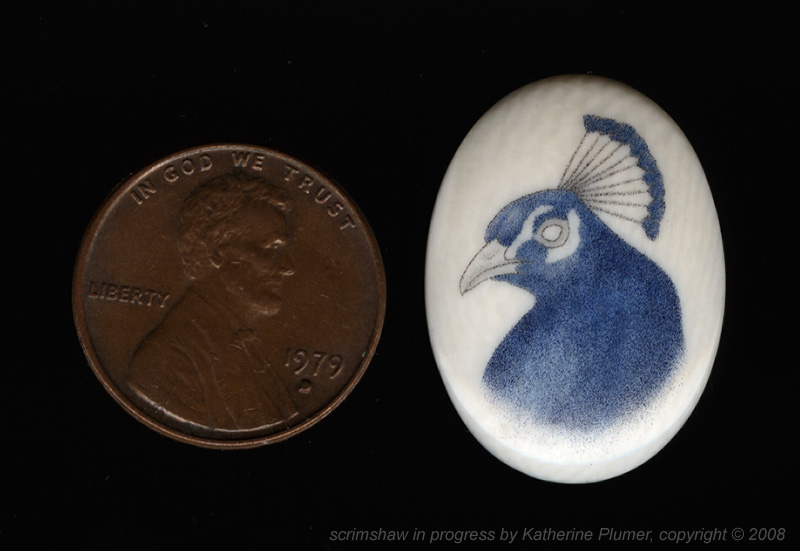
|
|
#7
|
||||
|
||||
|
Ooooo, this is going very well. :D Hopefully I don't jinx it by saying that, but I'm quite pleased!
After finishing the blue, I added a little blue-green on the bird's face and throat, and when that was done I added brown to the beak and eye. How I'm doing that is I'm scrimming MORE dots over what I've already done, and then those new dots will hold the new ink color. Is there some color bleeding into the previous scrimmed areas? Just barely. I am being SUPER careful with inking, I brush it on with that dinky little brush. You would probably not want to just randomly smear ink over the whole thing, that could have bad results. But I am finding that after applying multiple coats of wax over each finished layer I'm pretty well eliminating the problem of new colors sticking to old colors. Does that make sense? Sometimes I'm not sure if things make sense to other people, I just know they make sense to me. ![Smile[2]](/images/smilies/top smiles/smile[2].gif) Please ask if you have questions, I think I'm running out of things to show you that are different from anything I've done before. Please ask if you have questions, I think I'm running out of things to show you that are different from anything I've done before.Anyway, here's the blue-green finished (somehow it's more noticeable in person): 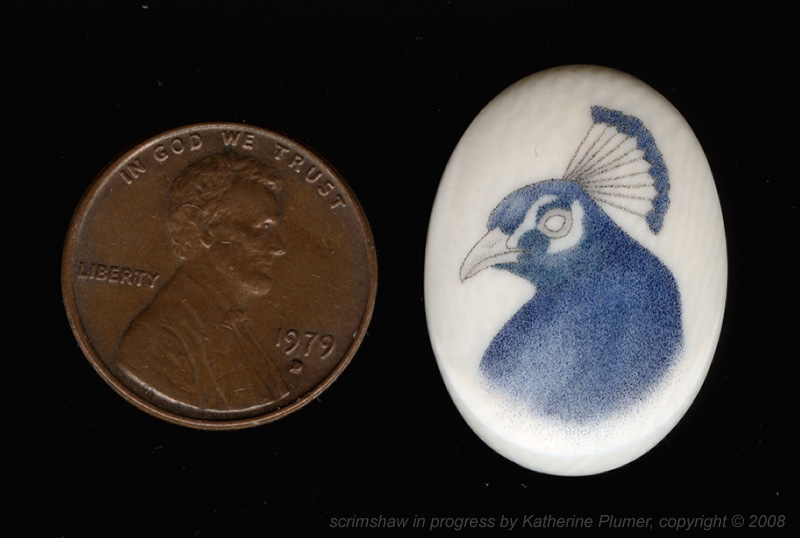 And then the brown finished: 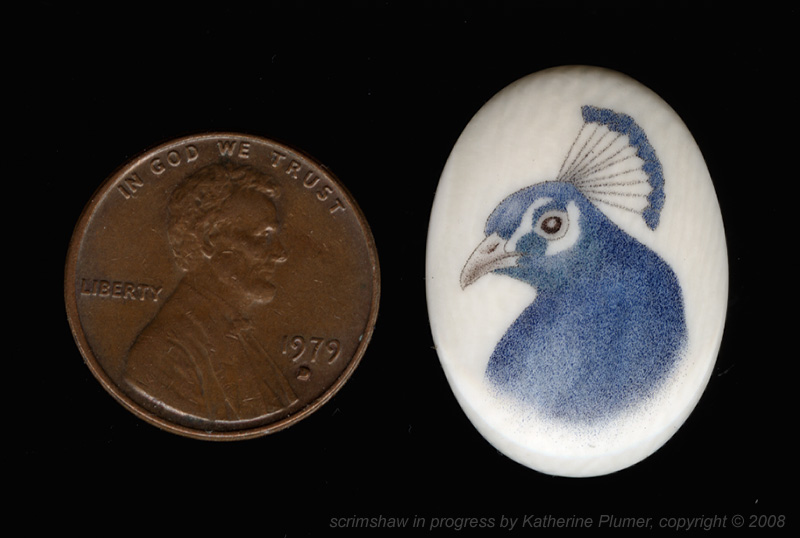 Up next is a lot of black. If I'm going to have a problem with ink going where it shouldn't, this'll be where it happens. Stay tuned... (hmm, I need to work on the mammoth ivory too!) |
|
#8
|
||||
|
||||
|
Hot diggity! Pardon me while I do a happy dance!
(I'm much better than that, but this was the only smilie..) ----> :dancing: LOL Finished!: 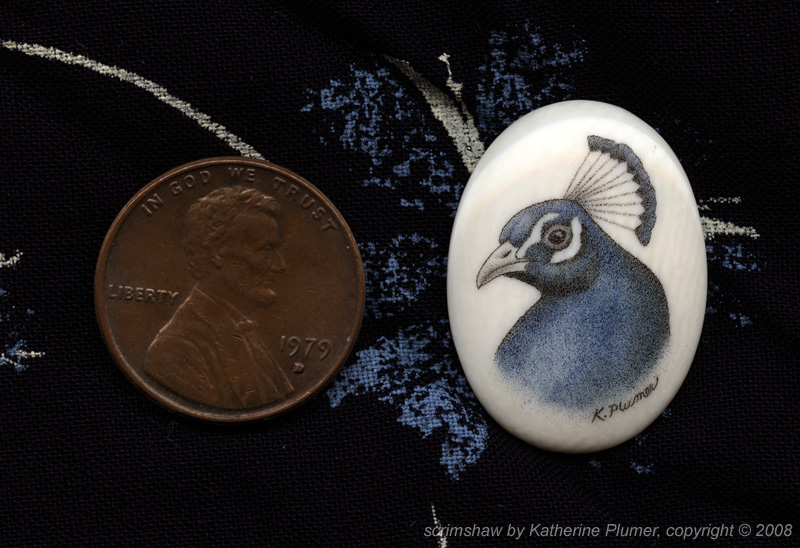 Mounted in sterling silver: 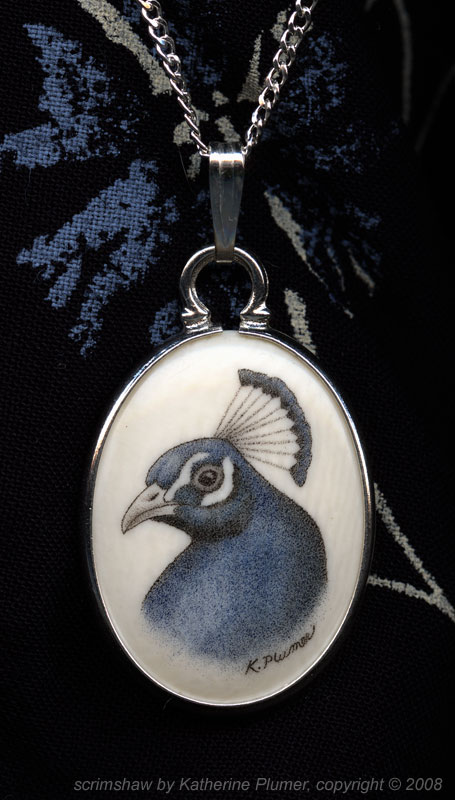 A closeup, this is scanned at something like 500%. It kinda shows the gradations and overlapping of colors: 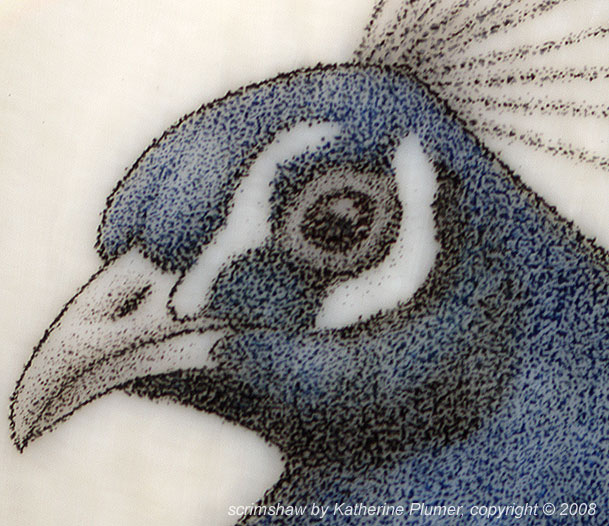 It worked! Glee! As predicted, the black ink IS the difficult one to work with, it's just so opaque, if it gets into the wrong places it's pretty hard to get it out of there. There is where a "three hair" paintbrush comes in, you really have to be careful inking, and removing excess ink. One thing I would like to work on is getting the color more saturated. Rod C was right when he called my scrim "subtly colored." It is! But you know, I'm pretty amazed how similar it actually is to my drawing... Mixing a brighter blue would have helped a lot with the saturation. Using dark blue instead of black for the shadowing would have helped, and of course the real solution is I just need to make MORE DOTS. I REALLY simplified the color scheme on this piece. Knowing now that it works and feeling more confident I can work with a broader range of color, more like my colored pencil work. It's definitely hard getting "solid" colors. I have seen some scrims that leave ink on the surface rather than fully buffing it down. Oh sure, that looks pretty, you get nice bright colors like that, but in my extremely opinionated opinion, that's not scrimshaw, that's just painting on ivory. Did I meet my goals? 1) learn to work with different ink: yes! It's a whole different thing than using etching ink, but it works and I think it's going to have much better staying power on a piece that's likely to be handled a lot (jewelry). Of course clients will still need to be careful and use common sense with this stuff, but for useable pieces (versus framed art scrim) I am now going to be using India and colored inks. 2) can I scrim from light to dark?: Yes!!!!!!!!!! :whoo: :whoo: :whoo: That's so exciting. Don't get me wrong, it's hard, it can be frustrating, it's not for the feint of heart, but it can be done. I wonder how it would work to do the shadows first, like a grisaille painting. I never paint like that anyway so personally I think it would be hard for me, but it may be a very valid method of scrim, I wouldn't rule it out. Might even have to try it some day. 3) did I make something pretty?: Well I think so. ![Smile[2]](/images/smilies/top smiles/smile[2].gif) I have ideas for bigger and grander color scrim, so keep an eye for those too! So many ideas, where do I start... ![Smile[2]](/images/smilies/top smiles/smile[2].gif) Thanks for reading! If you have any questions please feel free to ask. If there's anything you want to see me try in a tutorial let me know! -Katherine |
 |
| Bookmarks |
| Thread Tools | |
|
|