
 |
The Internet's Largest and Fastest Growing Engraving Community
Discuss hand engraving using basic to the most advanced methods and equipment
Forum Members: 14,762. Welcome to our newest member, Katherine
EngravingForum.com -
Domain since Feb 7, 2003
 Graver Video Conferencing is empty Join now!
|
|||||||
| ENGRAVING TOOLS - Paypal accepted | Classes | Glossary | Feedback | Tips | Sharpening | Bulino | Videos | Forum Policies |
 |
|
|
Thread Tools |
|
#1
|
|||
|
|||
|
Hey folks,
A few folks have been after me to do tutorial on how to use the Ray Cover set of templates Steve has for sale. So... I am going to try and do that here. I ask that everyone refrain from questions, comments etc until the end. By waiting until the end it will keep the tutorial cleaner and uncluttered. More importantly it will allow me to keep my train of thought so I can finish this in one evening and get it done. It is a really simple set of templates and I will try to be as straight forward as I can with the explanations. I am going to start with the tapering template since that one seems to give people fits for some reason. In this tutorial the captions are UNDER the pictures not on top of them. So anything said refers to the picture above unless otherwise noted. I also want to point out that the pics are taken with a graver that has already been made. I just did not have time to actually make a graver as I went with the pictures. 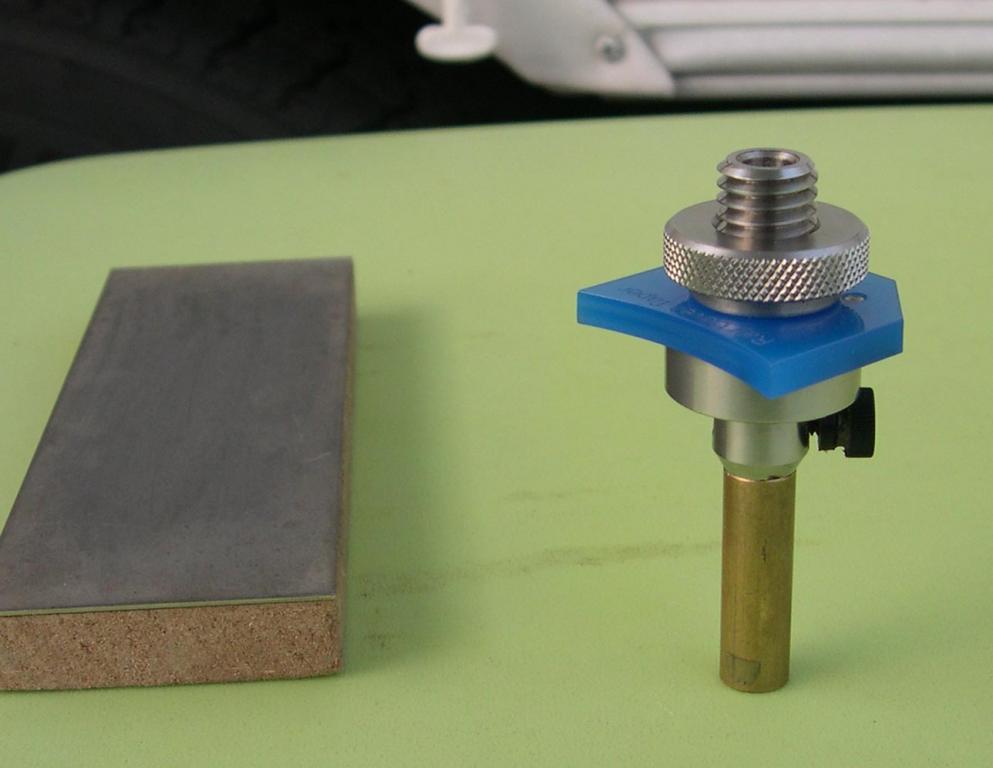 First we set the length that the graver sticks out of the fixture using the measuring tube, just like you do with any of the other Lindsay style templates. 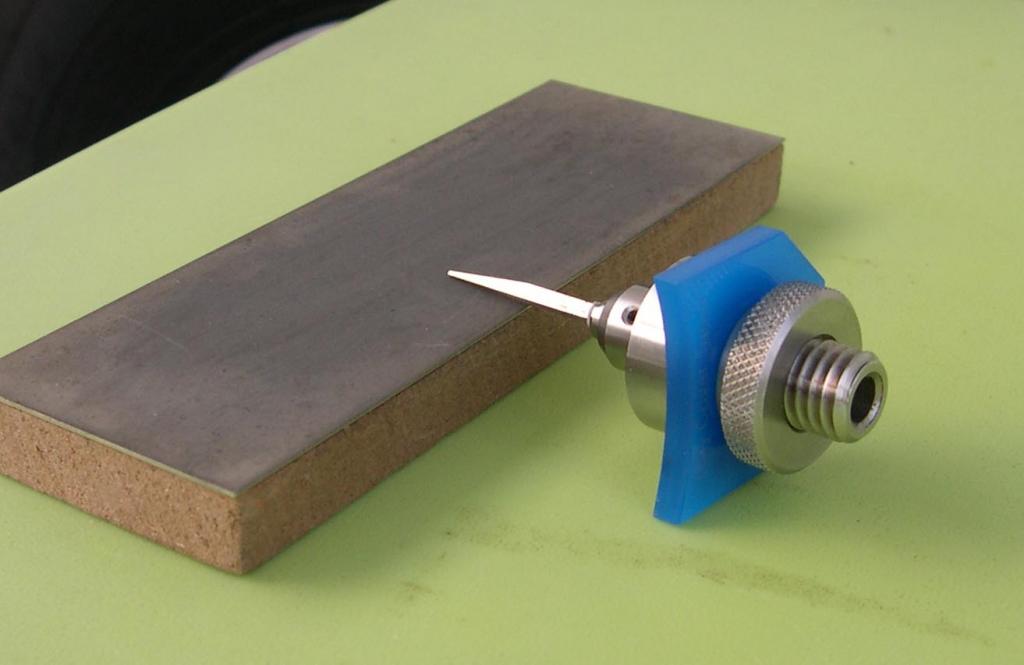 The use of this template is pretty basic. It simply tapers the top and sides of a graver blank down to the desired size. You can use this template to taper any graver to any size face you want no matter what Lindsay template was used to make the graver. This template is made to put approximately a 5 degree taper on the sides and top of the graver blank. There are two long sides to this template that taper the sides The picture above shows one of the long sides being used to taper one side and the picture below shows the other long side being used to taper the other side. [IMG]/http://engravingschool.com/forum-pics/Rays-sharpening-tutorial/taper3.jpg[/IMG] Please note: It is important to try and keep your graver symmetrical or the same distance from the center-line on each side. Always check this at the face of your graver. Students often hand me a graver and ask if its OK. I hand it back to them and tell them they have one side bigger than the other and they can't see it. The reason they don't see it is because they are looking at the distance they ground back toward the butt of the graver on each side thinking that if it the grind is the same distance back on each side it is the same width from side to side on the face. This usually isn't true. For this to be true EVERY aspect of the set up has to be set perfectly. The top of the hone has to be perfectly flat. The diamond lap has to be perfectly parallel with the top of the hone. the spindle of the hone has to be perfectly square to the top of the hone. The arbor on that spindle has to be perfectly square to the spindle. The laps can have no warp or flex to them at all. That is a lot of perfection that just usually doesn't happen in real life. To check your symmetry, put your graver under a loupe, magnifier, or microscope and look at the face to make sure each side is the same distance form the centerline running down the belly (or the the same distance from the point if you have already ground the face). 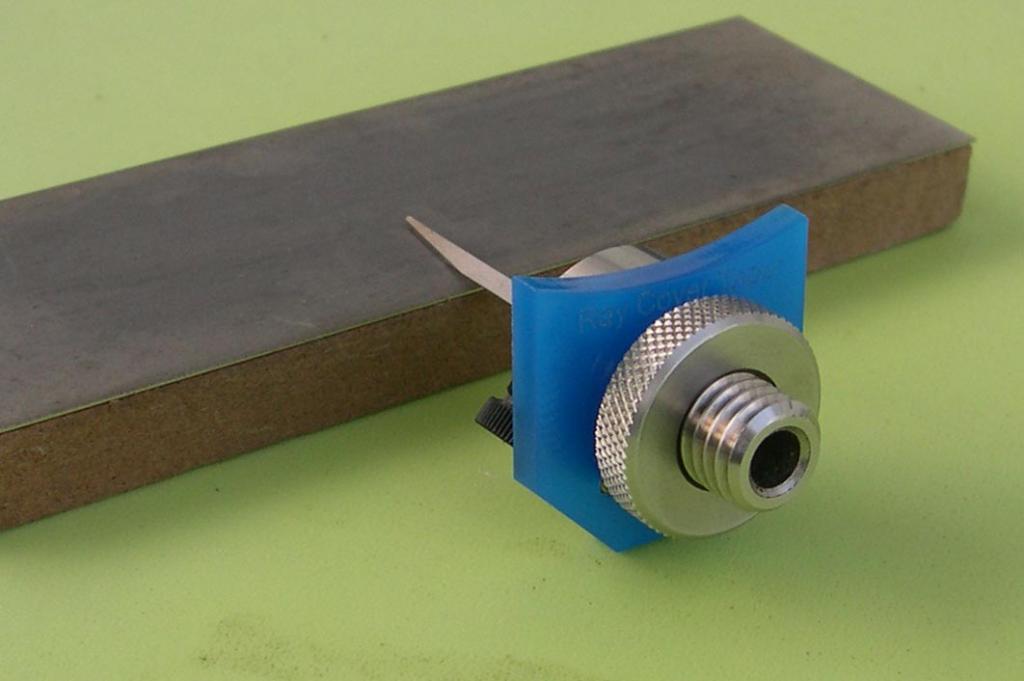 The short side shown being used above tapers the top of the graver. That pretty much sums up the taper template. |
|
#2
|
|||
|
|||
|
Now we will move on to the square graver template. For some reason Steve has this one labeled "Standard". I don't remember what the reason is but the template labeled "standard" makes a traditional square graver. I had trouble getting good lighting on the actual graver pictures but I think they came out OK enough for people to see how they are made. The graver pictures are not of actual gravers but of oversized ones I made to make it easier for students to see the business end in a classroom setting.
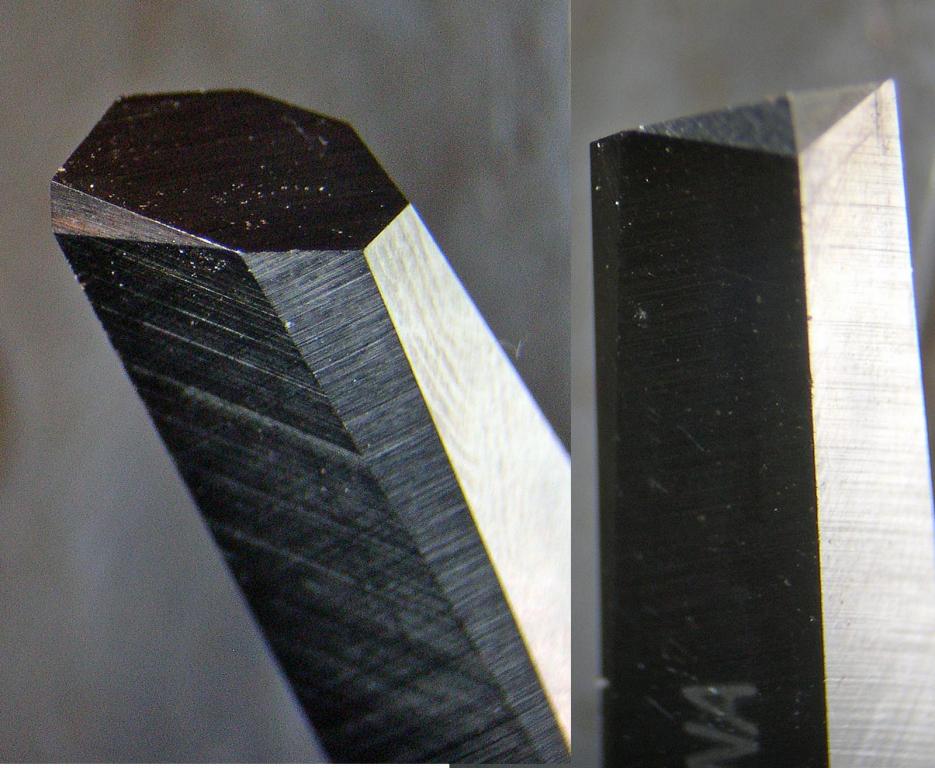 The picture above is what the point should look like. This graver has a 55 degree face and a 15 degree compound heel (or double heel, one on each side of the belly). Let me point out that this can be tapered down more than it is or not tapered down at all. Don't get hung up on what the back of the graver looks like or how wide it is. You can make this as wide or narrow as YOU WANT IT. Some people even round the back of. What goes on with the back is of NO consequence to how it cuts. Its the point you should be concerned with. 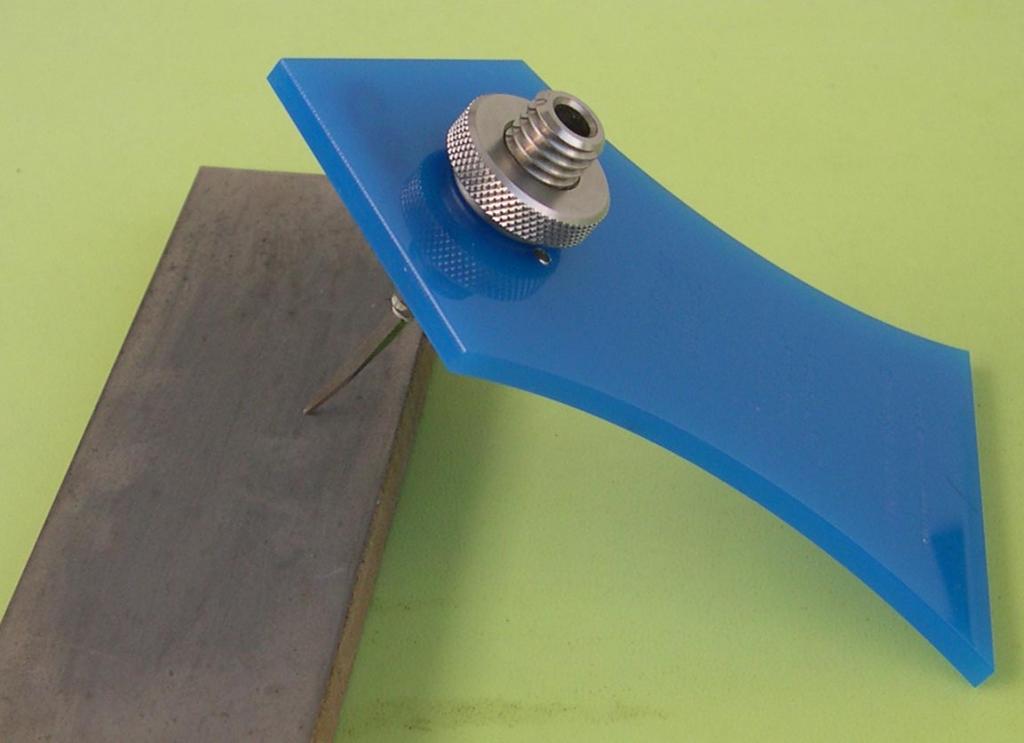 The first facet I always cut is the face. This is done using the long side of the template as shown above. Make sure and grind this all the way down to a full diamond shape on the face. In other words, grind it all the way down to a full point on the tip. Once the face is ground and polished (I usually only go down to a fine ceramic for polish on this), I will use the taper template shown in the first section to taper the top and sides. In reality it doesn't matter if you taper before or after the face is on. Teaching classes has shown me that it is usually easier for most people to understand if they put the face on the graver first. That puts the point on the graver and once it has a point they can see how it is supposed to oriented (top bottom etc). this makes tapering easier for most people because now they can see which are the sides of the graver and which is the top. That is why I have developed the habit of grinding the face first then switching to the small taper template and tapering the sides and the top. Then I put it back into the large "Standard" template and put the heels on. 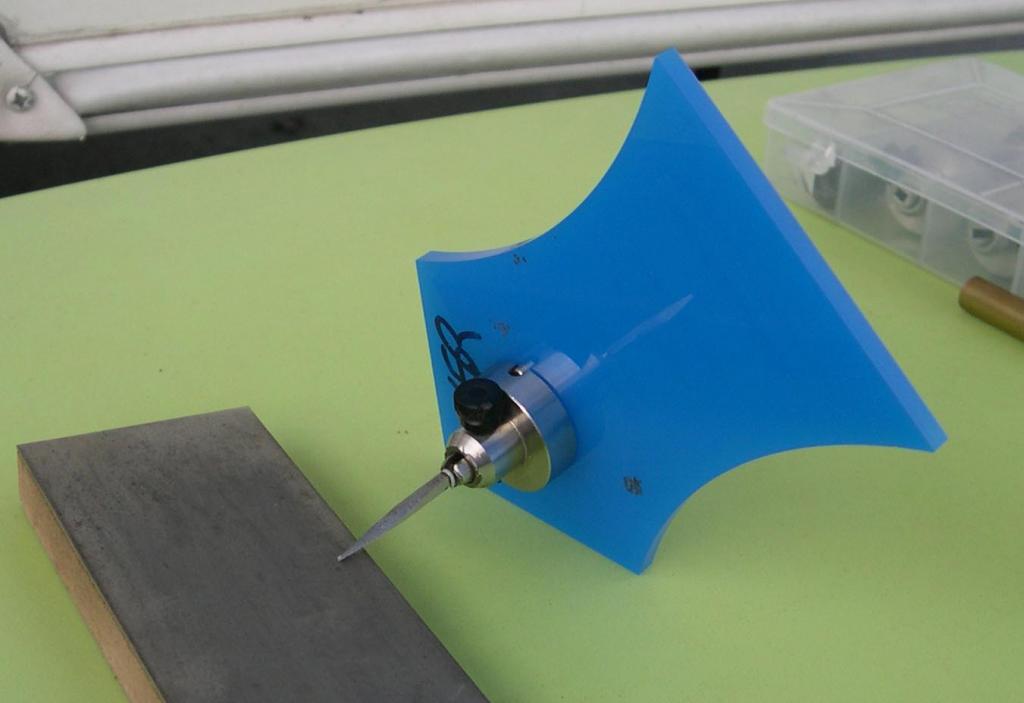 Above you can see one the template being used to put a heel on one side fo the belly and then in the pic below you can see the template being used to put the other heel on the other side of the belly. 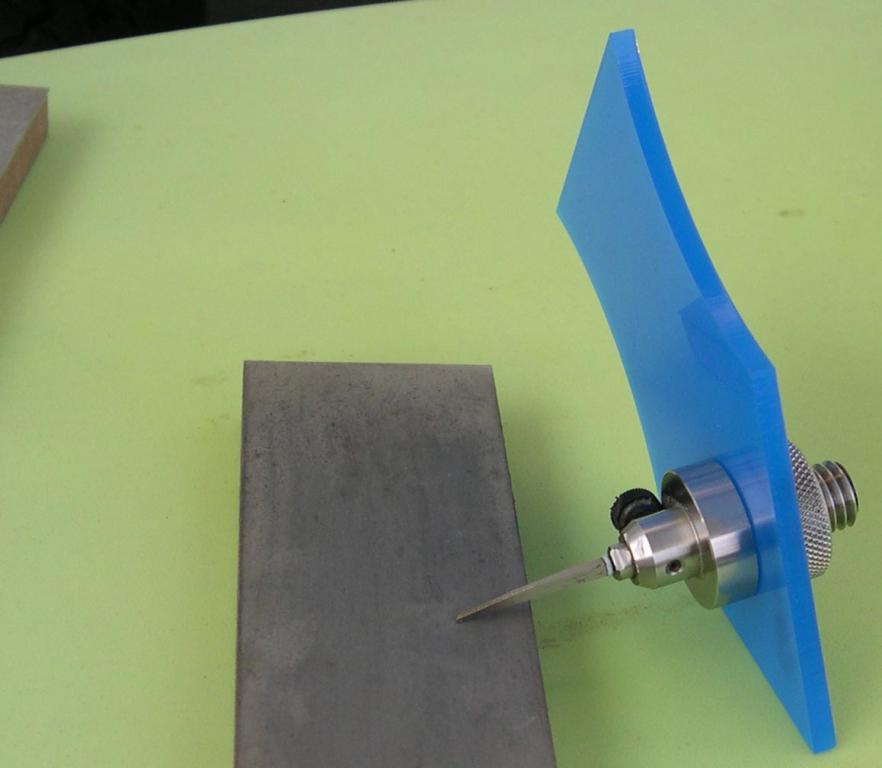 KEEP THE HEELS SMALL!!!!!!!!!!!!!!!!!!!!!!!!!!!!!!!!!!!!!!!!!!!!! !!!!!!!!!!!!!!!!!!!!!!!!!!!!!!!!!!!!!!!!!!!!!!!!!! !!!!!!!!!!!!!!!!!!!!!!!!!!!!!!!!!!!!!!!!!!!!!!!!!! !!!!!!!!!!!!!!!!!!!!!!!!!!!!!!!!! If you look at the first picture of the actual graver you can see the heels go no further back than the edges of the face. Many times newbies will complain about not being able to cut a curve or scroll with a "V" style graver without scraping and galling on the outside of the cut. They also complain about constantly breaking points. Th numbe rone cause for this on any graver that cuts a "V" shaped channel is the heels being too large |
|
#3
|
|||
|
|||
|
Now we are going to do the background flat. Below is a pic of what that should look like.
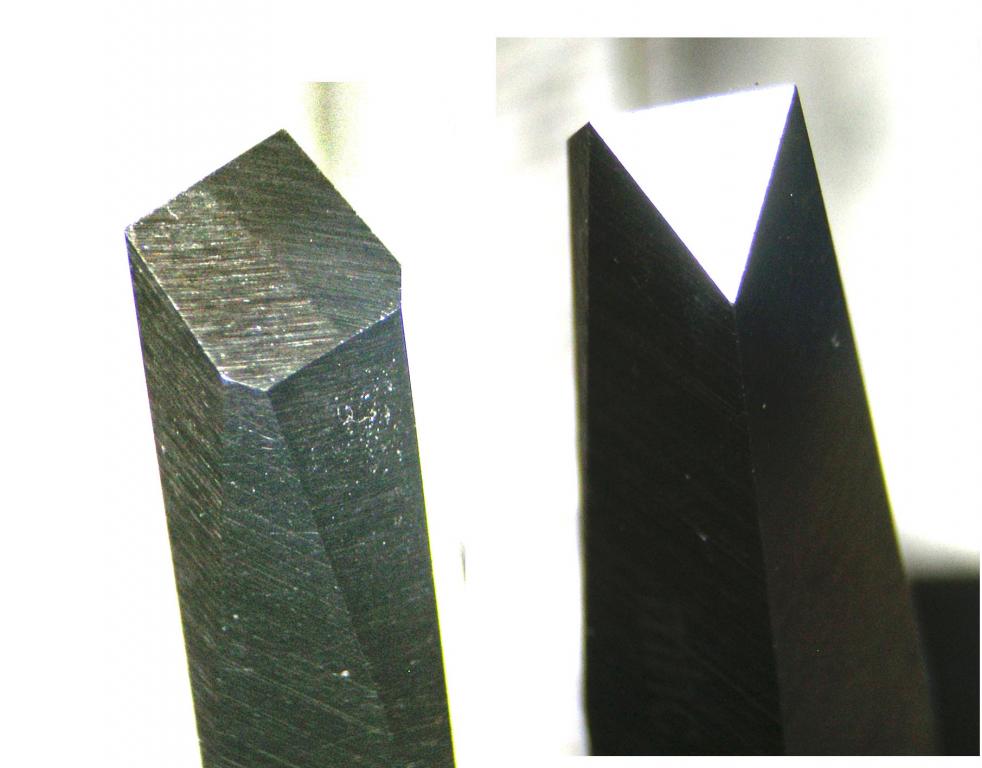 In the pic above is the basically what your background flat should look like. It has a 55 degree face and a 30 degree heel. The pic on the left shows the face side of the graver and the pic on the right shows the heel.In a discussion some time ago on one of the forums we were discussing this type of graver and Marcus Hunt said this type of graver, in England, is referred to as a "Scorper" I want to point out that this has a 30 degree heel. To use this you are going to have to hold it at a much higher angle. When people are having trouble making this graver cut is usually because they are not holding it a a high enough angle and they are just skating around on the back of the heel without even engaging the cutting edge. Also notice that this graver is a flat made on one corner of the graver blank. it is not made on a flat side of the graver blank. The high angle of the heel and being made on the corner are what give this graver a lot of clearance while relieving background. By making it on an edge you life the bottom edges of the graver getting them out of the way while you cut. This also makes the heel triangular rather than rectangular which also gives more clearance. 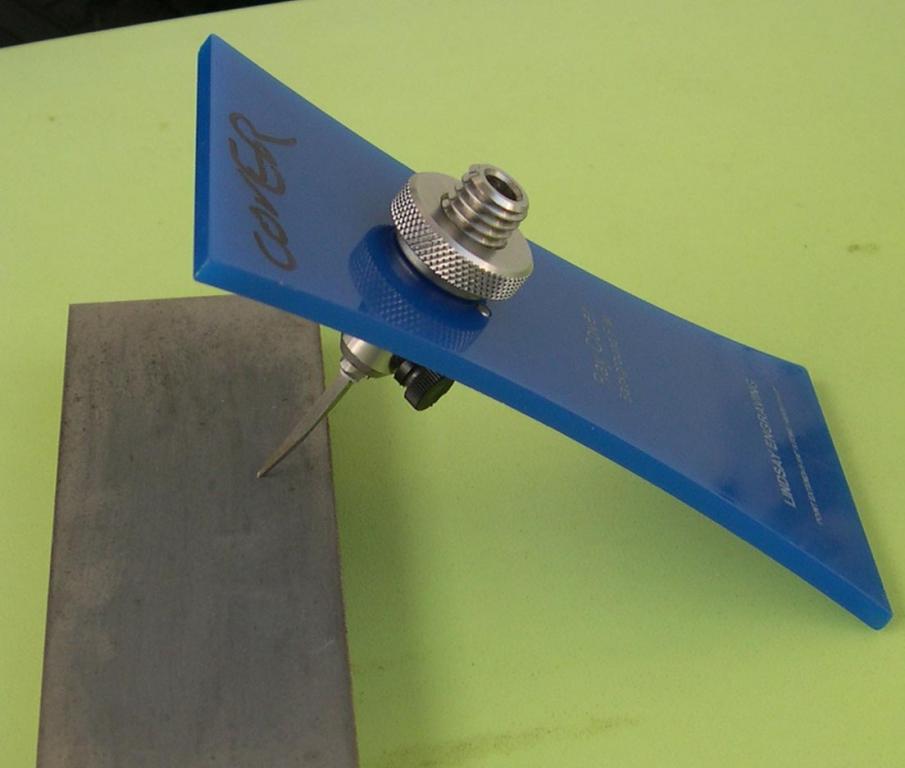 Again the first facet I usually grind is the face. Use the long side of the template to do this (Shown above). Once the face is ground and polished I will taper to the desired width using the small taper template and then put on the heel. I usually have three or four widths of these and switch back and fourth as needed when I am cutting background out. They will vary in width from about a third of a mm on the small to about a mm on the largest. 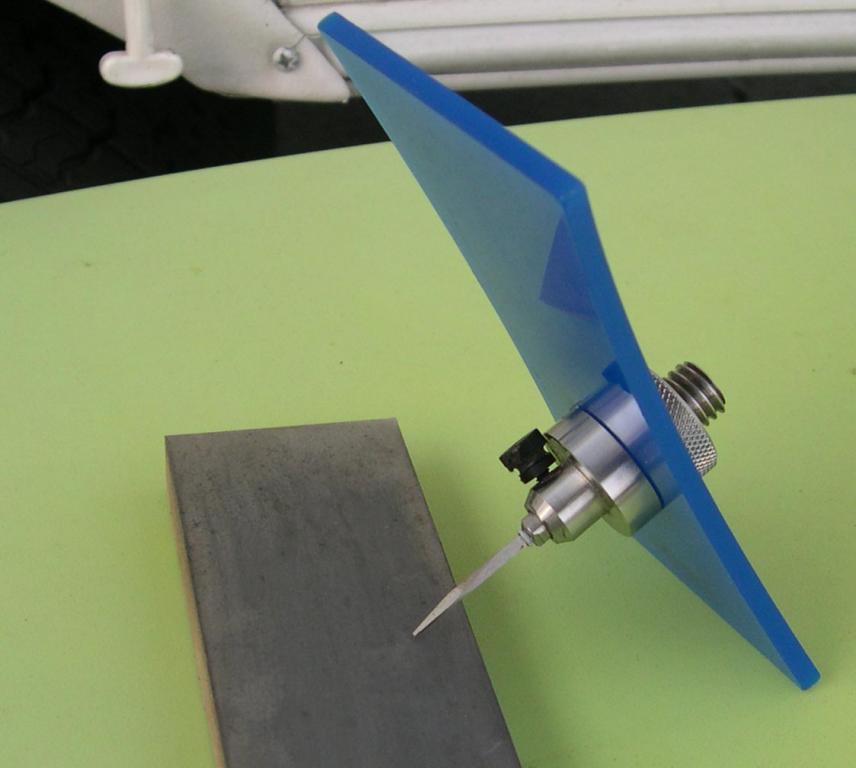 Above you can see the short side of the template being used to put on the heel. Again, keep the heel short. If you look at the pic of the graver that heel doesn't go much past the side corners of the graver. You can get away with taking them back a little farther than I did on the one pictured but not much farther. |
|
#4
|
|||
|
|||
|
Now we move onto the Bright cut flat. This one has more steps than the others but it still isn't bad to make.
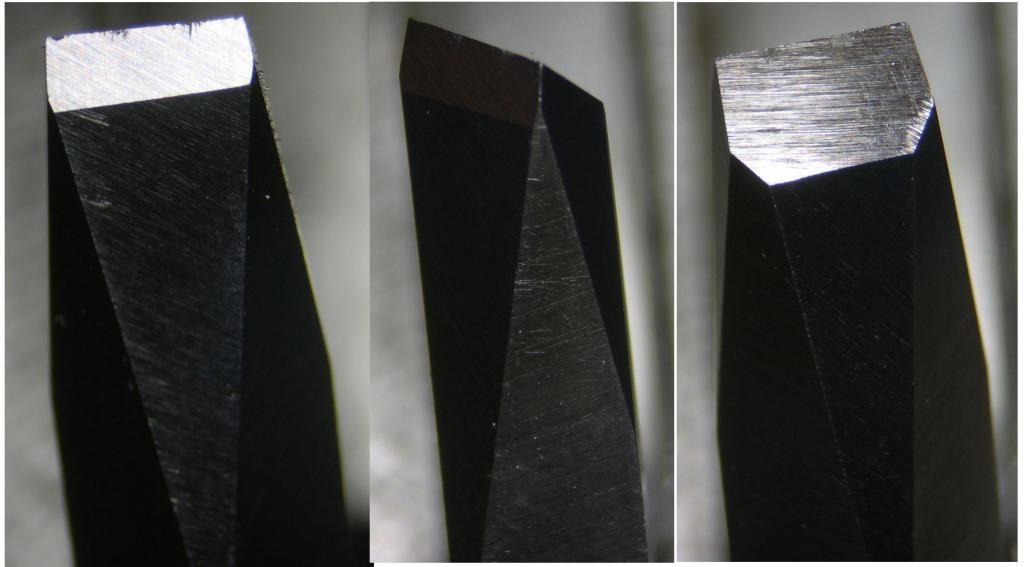 The pic on the above left shows the heel and the relief cut behind it. The middle shows a 3/4 view of the heel and one side. The pic above right shows the face and top of the graver. This is another "flat" graver made by turning the blank up on corner to achieve more clearance while cutting. The face is at 45 degrees. The heel is 15 degrees. 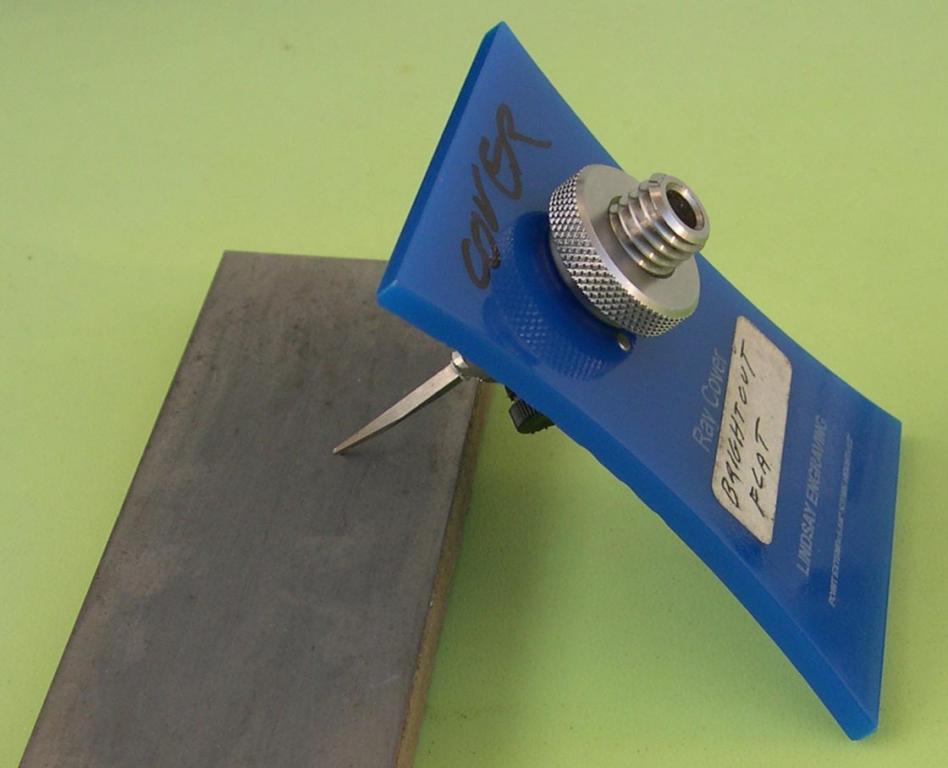 The above pic shows the face being ground using the long side of the template. Just like with the others I grind and polish the face first and then taper the sides to the desired width. I should mention here that it is just as important to keep these flat gravers symmetrical too. It doesn't have to be prefect but if the symmetry is off by much it will cause problems grinding the heel later. 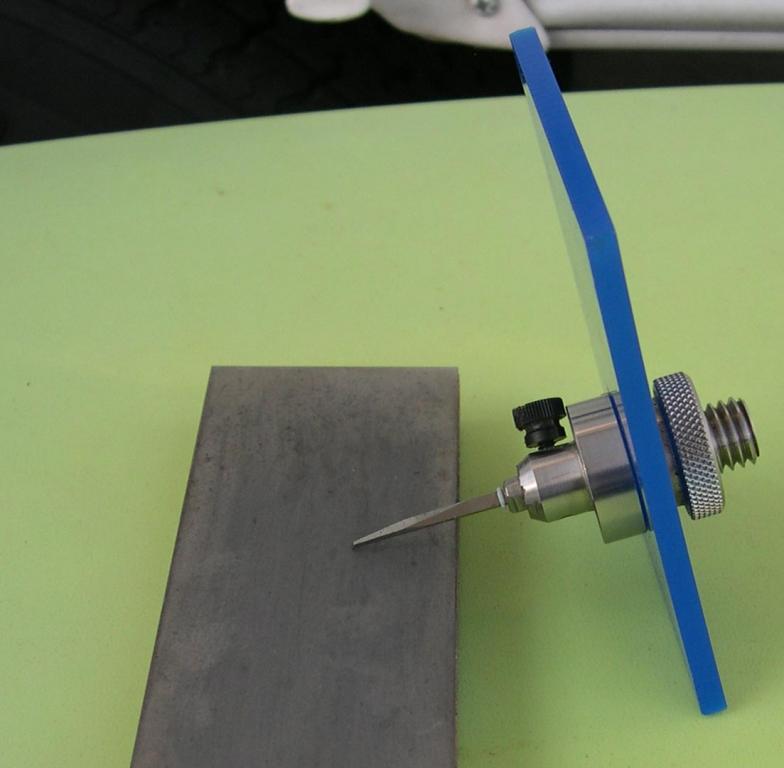 Once the graver has a face and is tapered to width I will put the heel on it. Above you can see the short side of the template being used to grind the heel. This heel should go all the way across the width of the graver like on the background flat.... and then go a little further. See the first pic of the bright cut flat above. Note the heel goes all the way across the width and then is about a third mm back along the sides of the graver. If you stop this heel at the corner like we did with the background flat it doesn't have a lot of structural support and will break easily. You will notice the heel will be a HUGE triangle by time you get is that wide. That's OK, it is supposed to be at this point. we take care of that int eh next step. 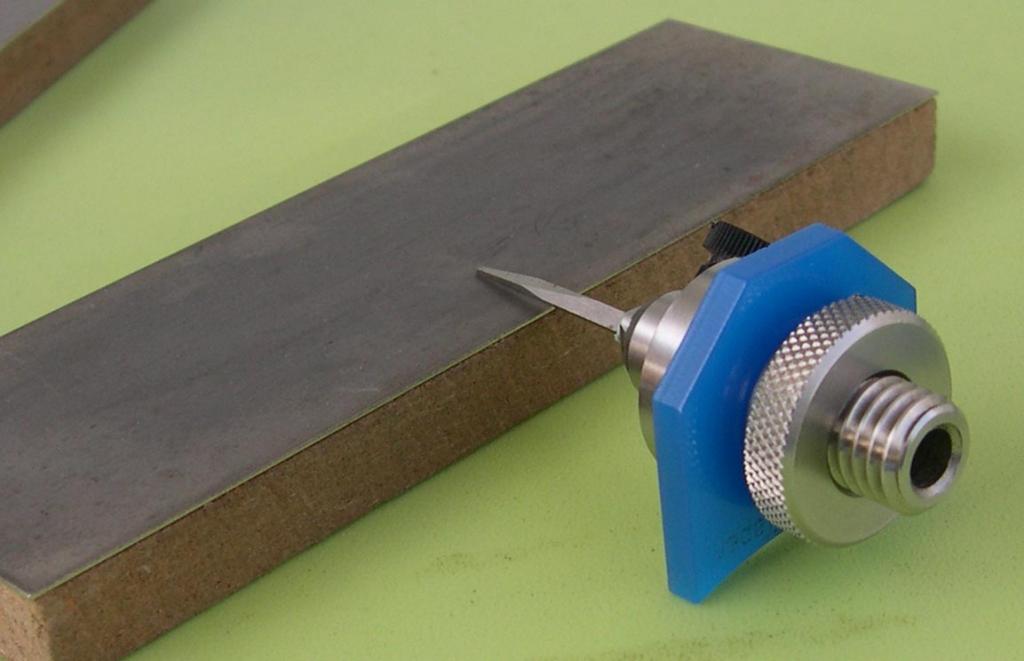 The next step pictured above is to use the little taper template to grind a relief cut behind the heel. We use the curved side of the taper template for this. This relief cut will grind off the point on the triangle of the heel facet. The heel facet will shrink toward the face as you grind this relief cut. Grind the relief until the heel is only about 1/2 to 1 mm long. |
|
#5
|
|||
|
|||
|
Last we have the bulino template. This template actually makes both a dot bulino graver and a line cutting bulino graver.
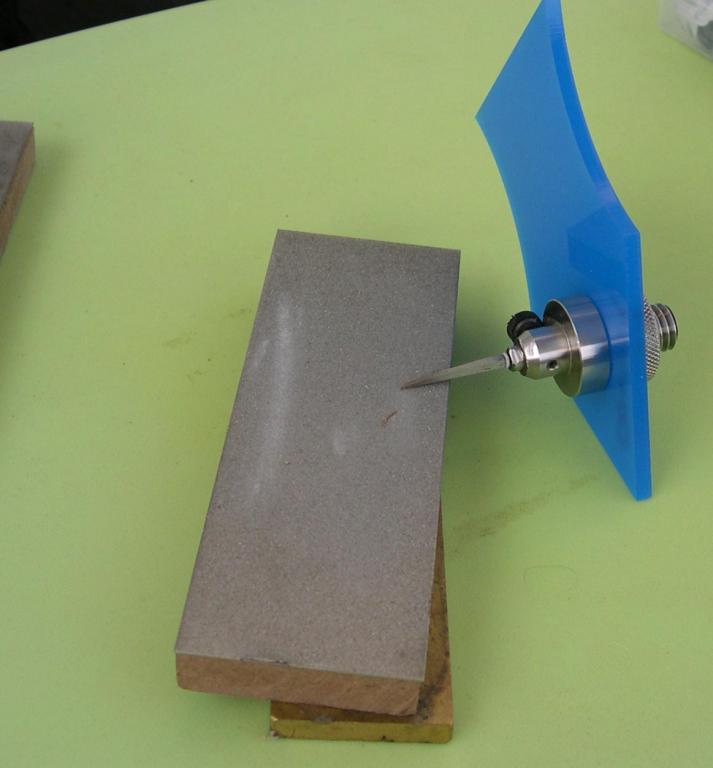 We will do the line cutting bulino graver first. This is a graver that makes a "V" shaped cut and has a 70 degree belly. First grind and polish the face using the long side of the template as shown above. Then use the small taper template to taper the graver to the size you want it. I usually make my bulino gravers tiny on the face because I am cutting tiny line with them. 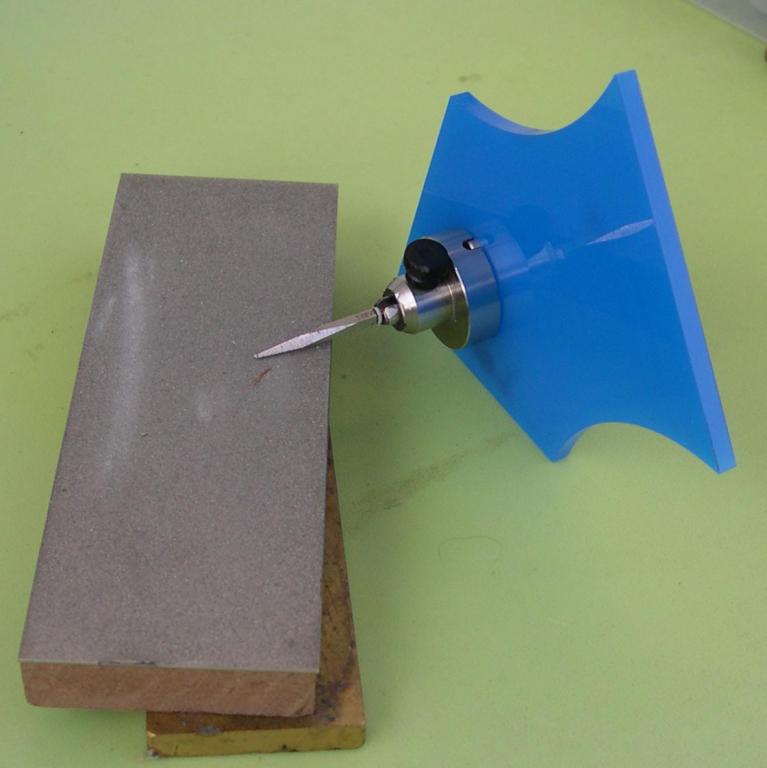 The next thing we need to do is regrind the belly to 70 degrees. We do this one side at at a time. Above you can see one side being ground. I usually grind this back about 1/8 of an inch or about 3mm. once ground I usually polish on a very fine grit lap or ceramic stone.  In the above pic the second side of the belly is being reground. These reground bellies look like giant heels but they are not heels. they are actually a new angle being reground on the belly. In this case being ground from 90 degrees down to 70 degrees. Once the new belly is reground and polished it is ready to use. Below we start the dot cutting bulino graver.  The first thing you do to make a dot cutting bulino graver is to grind the face in the same manner as the face fo the line cutting bulino graver was done. This is shown at the top of this post section. The belly is reground on the dot graver the same way as the line graver with one exception. The line cutting graver is ground at the standard 1/2 inch stone height. The dot graver is reground at 3/4" stone height. All you have to do is get a 1/4 inch spacer and drop it under your diamond stone. I made a 1/4 thick washer for a spacer on my power hone so I can grind these on my power hone. 
|
|
#6
|
|||
|
|||
|
That is pretty much it. I know folks are going to ask questions and I will try my best to answer them. However, I will not answer the same question over and over so please read through the post and replies to make sure your question has not already been dealt with.
|
|
#7
|
|||
|
|||
|
thanks Ray
|
|
#8
|
||||
|
||||
|
Thanks Ray!
I think taking a printout and grinding some gravers will answer any questions left over from your fine explanations. |
|
#9
|
|||
|
|||
|
Very nice tutorial Ray. What are the advantages of your square graver vs. Steve's universal? Could you please post close up pics of the bulino gravers tips as you did with the others. Thank you
|
|
#10
|
|||
|
|||
|
The difference between the two have been debated to death. I won't revisit it here. I am sure you can find many threads on that topic on the various forums if you look. There are good engravers who like both. Neither is a magic bullet. Neither will make you a better engraver.
I don't have pics of the bulino gravers to post as I don't have big ones made to take pictures of. |
|
#11
|
|||
|
|||
|
Thanks Ray. Did the search. Pics of the actual size is fine.McAhron
|
|
#12
|
|||
|
|||
|
Thank you, that clears up several questions about the templates.
|
 |
| Bookmarks |
|
|